
Hey there and welcome back to a new episode of our Docker’s series, previously we walked through “How to get started with Docker“. This time I wanted to make a short post demonstrating the functionality of one of my favorite Docker’s image/applications to seamlessly manage and visualize all your containers from a GUI (Graphical User Interface ~ Web interface).
For this, I will use the same Linux Machine from our previous post, currently this VM has a few containers (2 Nginx containers, 1 for Grafana, and 1 for Busybox). We can check this with sudo docker ps -a

The container we will be using for management of all on our containers is called Portainer, which in the words of their creators is “A lightweight service delivery platform for containerized applications that can be used to manage Docker, Swarm, Kubernetes and ACI environments. It is designed to be as simple to deploy as it is to use. The application allows you to manage all your orchestrator resources (containers, images, volumes, networks and more) through a ‘smart’ GUI and/or an extensive API.”. One thing to consider about Portainer is that it comes in two versions CE (Community Edition) and BE (Business Edition), for this post I will be using the CE version. The installation process is rather straightforward and can be done from the CLI by running:
# Create the volume to be used for Portainer data

sudo docker volume create portainer_data

# Download and install Portainer

sudo docker run -d -p 8000:8000 -p 9443:9443 --name portainer --restart=always -v /var/run/docker.sock:/var/run/docker.sock -v portainer_data:/data portainer/portainer-ce:latest
We can check the installation completed successfully by using the same command:

Now, we should be able to access the Portainer’s web console from our browser by going to the IP of our Docker machine on port 9443 (Ex: https://<Replace_with_your_IP>:9443), you will be asked to set a username and password:
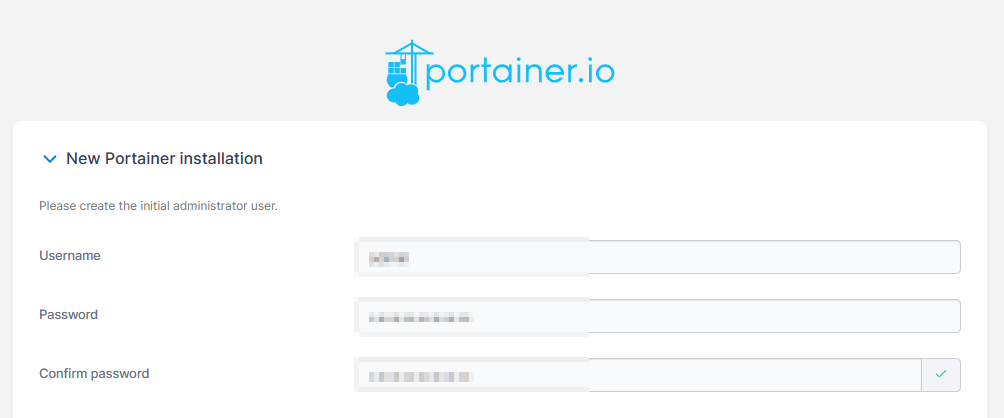
Awesome! That went smoothly (sometimes you may get a “timeout” error which can be fixed by restarting Portainer with sudo docker restart <portainer_container_id>).
From the console you can go to Home > Local to access your local environment:
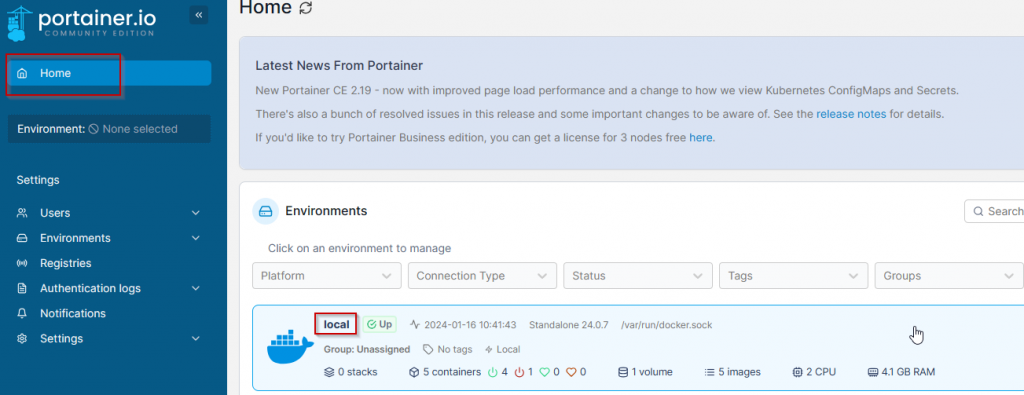
Here you can gather all kinds of information about your Docker’s environment including the current containers, their statuses, images, networks, and much more:

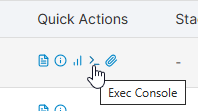
From this view, we can do things such as stopping/starting our containers, look at logs, you can access the CLI console of each container individually by clicking the CLI icon under “Quick Actions”:
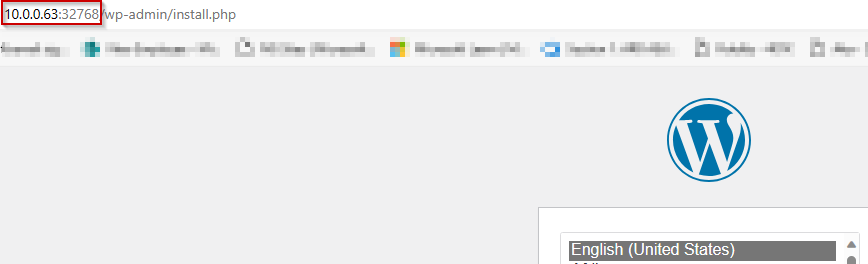
One cool thing you can do is deploying full-fleshed applications directly from templates in Portainer > Local > App Templates, for instance a WordPress site.

Using the above template downloaded the required images and created a stack and 2 containers for the DB and Web server functions of WordPress:

Which we can access directly from our browser on port 32768:
One thing I wanted to mention is that you can have multiple environments (nodes/servers) with Docker and manage them all from Portainer, for that you will need to install the Portainer agent as another container in each of your environments and link it to your Portainer server installation. You can find out more about that process in the official Portainer’s docs.
Awesome! Consider it top-notch in my opinion! 😀 I really hope this post comes in handy and kicks off your Portainer journey if you’re new to it. Thanks a bunch for reading and catch you in our next post!