I’ve decided doing something different from my previous posts, while I am preparing to take the Azure Certified Administrator (AZ 104). I thought it would be a good idea to practice a few labs to get more hands on and share my observations with you all!
I will be following the MS Learn exercise in this page.
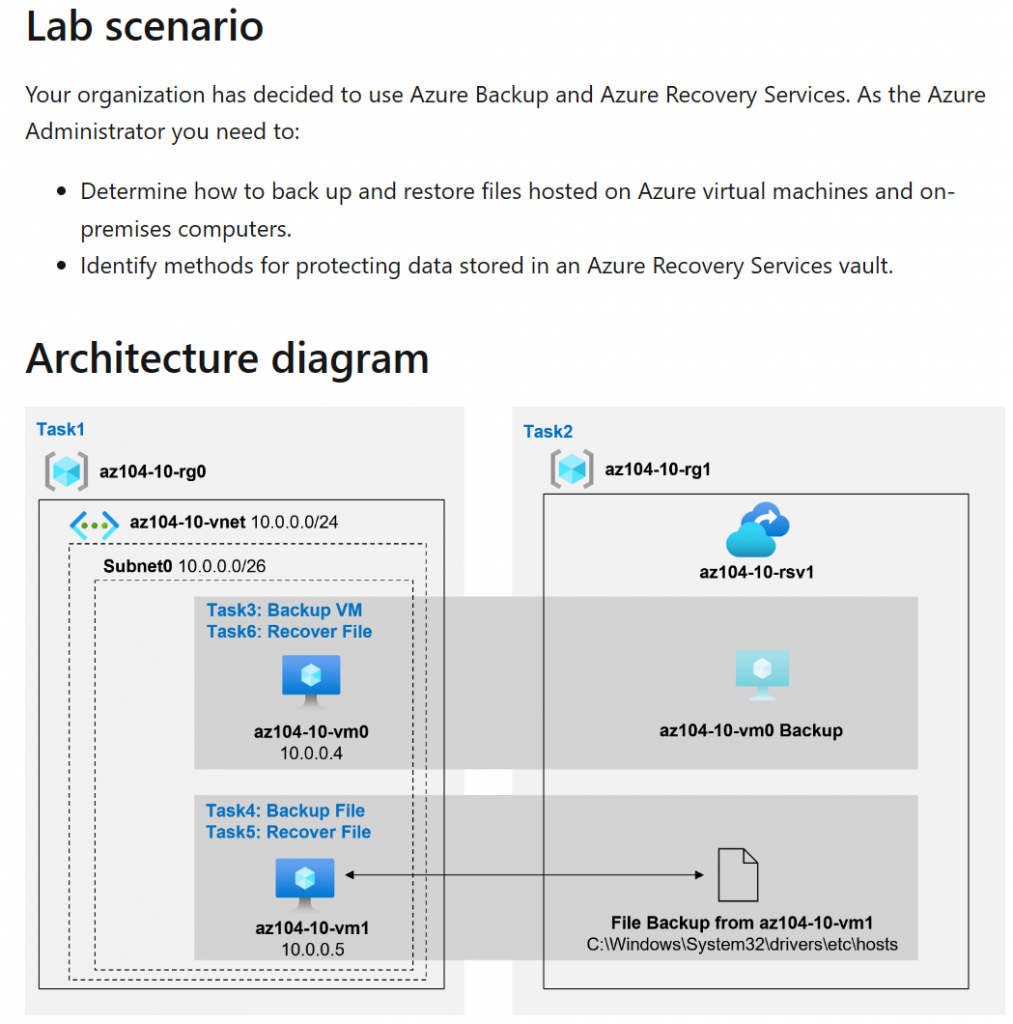
Our first task is to create the lab environment.
For this deployment we will be using an ARM template provided in Microsoft’s GitHub page.
How do we do it? Well, for this we can either use AZ CLI, PowerShell, or Cloud shell. You can use the one in which you feel more comfortable, in my case I will be using PowerShell and deploying this resources in my Azure Subscription.
I’ve downloaded the ARM’s template contents and place it in a file called “backups-lab.json”. Then from PowerShell I navigated to the file’s location. In a nutshell:
# Navigating to file's location folder

cd c:\tools\arm-templates

# Checking it's there

ls

# Connecting to my Azure subscription

Connect-AzAccount

# Setting up subscription to be used

Set-AzContext -Subscription "xxxx-xxxx-xxxx-xxxx"

# Deploying a new Resource Group

New-AzResourceGroup -ResourceGroupName backups-RG -location centralus

# Deploying ARM Template in resource group

New-AzResourceGroupDeployment -ResourceGroupName backups-RG -TemplateFile .\backups-lab.json -Verbose
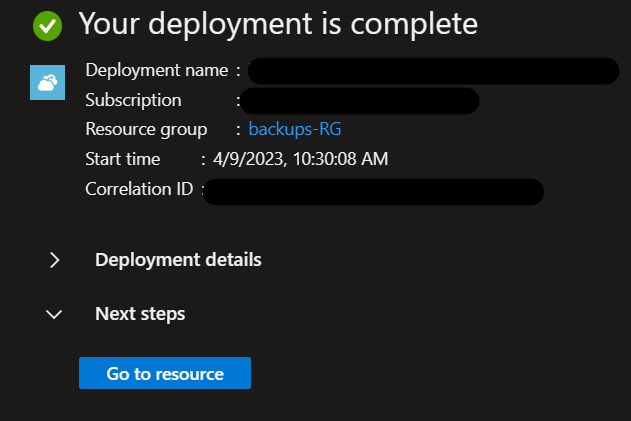
From our Azure portal we can also see the progress, if we go check this resource group.

Awesome! We have our deployment completed and initial two VMs deployed. We will be using these VMs to test various backup scenarios.
- Task 2: Create an Azure Recovery Services vault.
- Create a Recovery Services vault in the same region you deployed the virtual machines.
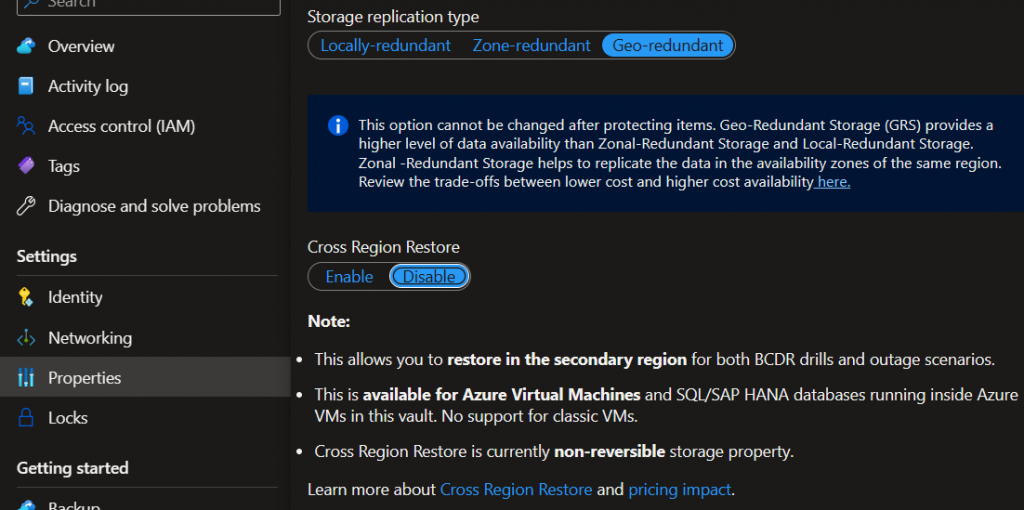
- Configure the Recovery Services vault for geo-redundant storage and soft delete.
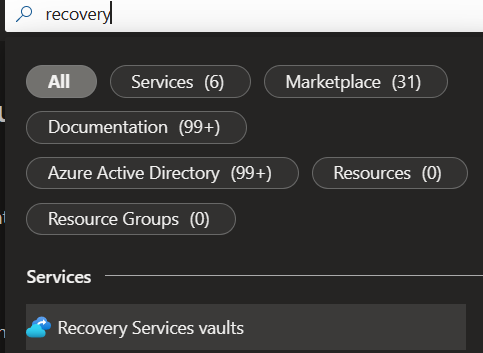
We will head to our Azure portal and deploy this recovery services vault.
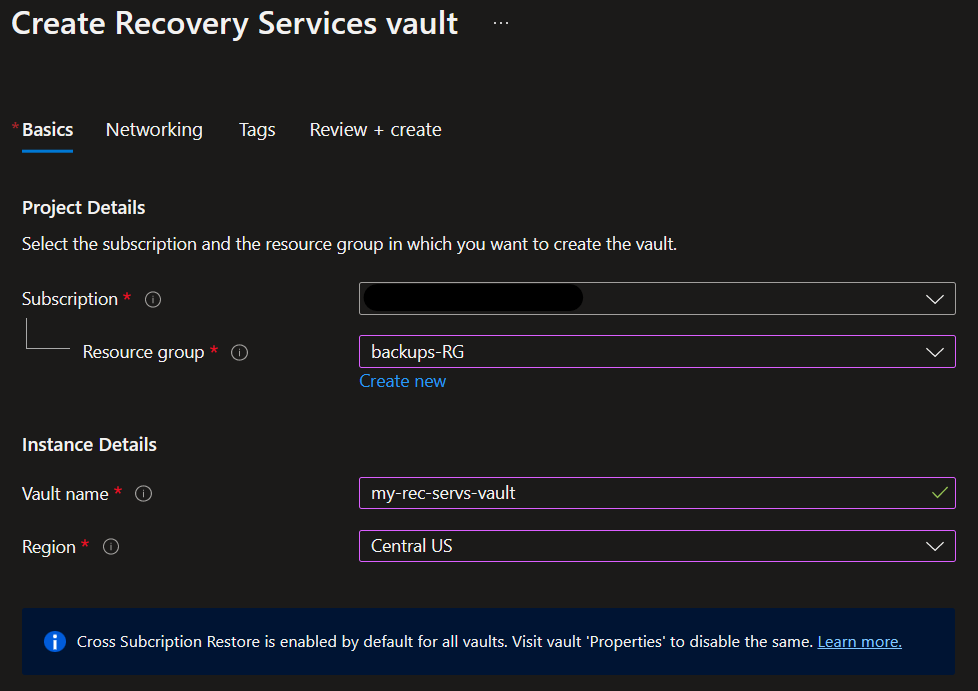
I will leave the rest of settings as default and create.
While this is deploying, let’s review what is a Recovery Services Vault, according to this article the definition reads “A Recovery Services vault is a storage entity in Azure that houses data. The data is typically copies of data, or configuration information for virtual machines (VMs), workloads, servers, or workstations. You can use Recovery Services vaults to hold backup data for various Azure services such as IaaS VMs (Linux or Windows) and SQL Server in Azure VMs. Recovery Services vaults support System Center DPM, Windows Server, Azure Backup Server, and more. Recovery Services vaults make it easy to organize your backup data, while minimizing management overhead.”.
Also, some of its key features include:
- Security capabilities such as “Microsoft Azure Backup Server (MABS), Data Protection Manager (DPM), and Microsoft Azure Recovery Services (MARS) agent“.
- Prevention: To validate before completing critical ops (EX: Changing a passphrase).
- Alerting: Send an email when critical ops are completed. (EX: deleting backup data).
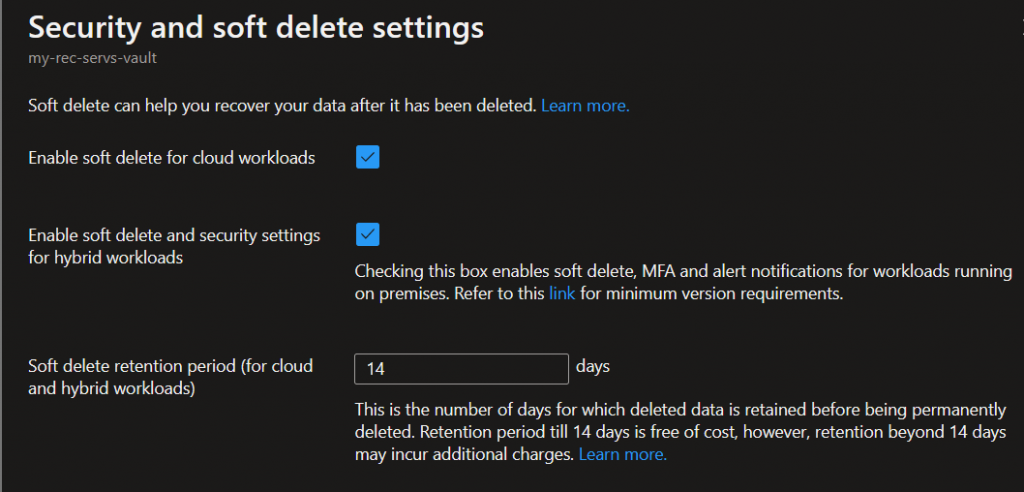
- Recovery: Soft-delete retained for 14 days in case of accidental deletion.
- Monitoring
- Role-Based Access Control (RBAC)
- Cross Region Restore (CRR): To restore in a secondary paired region. Great for data compliance, outages, and Disaster Recovery (DR) scenarios.
Ok. it is deployed!
Now, let’s configure it for geo-redundant storage and soft delete.
Hitting back to our portal, let’s go check this resource and find this property to configure.
Found it! Seems like this is already being done by default.
Checked Properties > Security Settings
And properties > Backup configuration
Now for task 3:
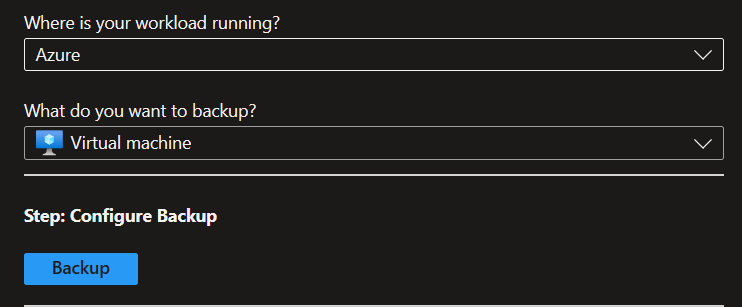
- Task 3: Implement an Azure virtual machine-level backup.
- Configure the Recovery Services vault to back up Azure virtual machines.
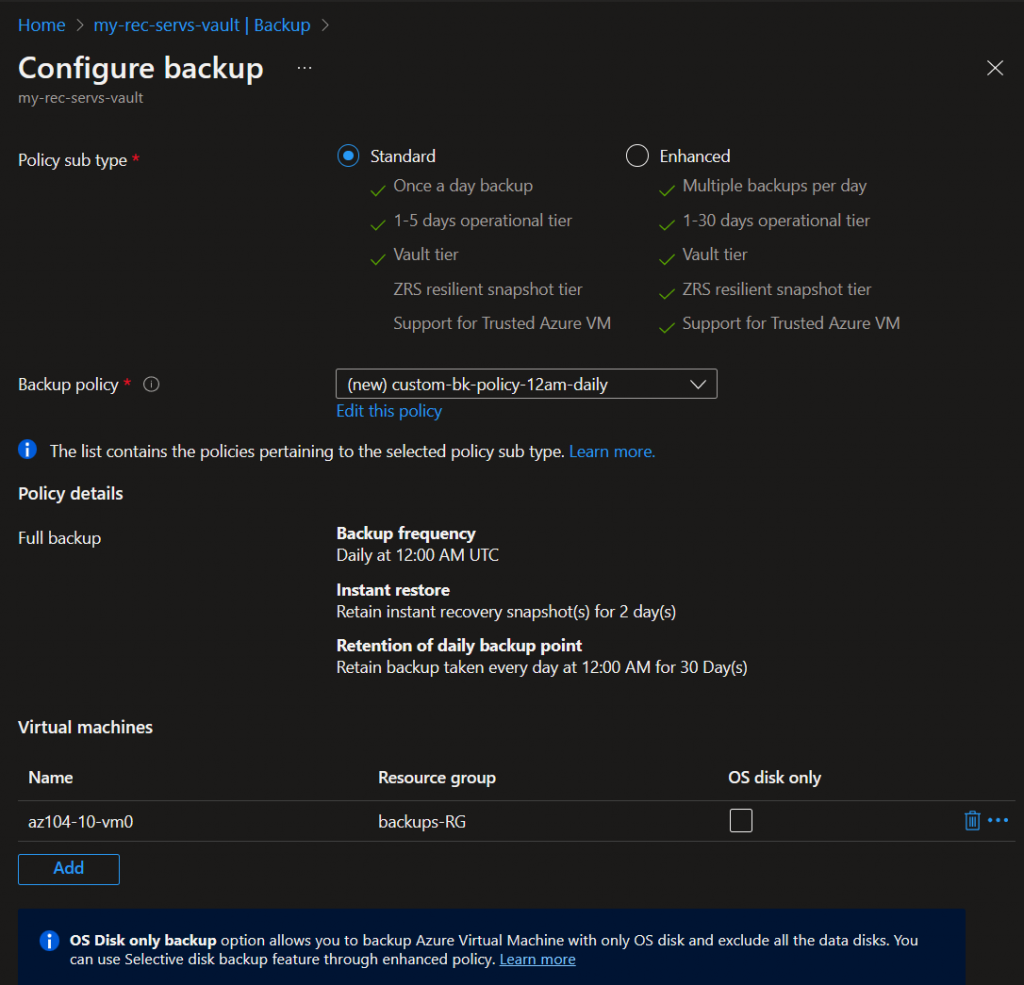
- Create a backup policy to run daily at 12:00 AM.
- Enable backup for one of the virtual machines.
Going to the “backup” tab. Let’s set this up for backing VMs.
The default policy back ups daily starting at 1:30 am UTC, so we will create a new policy and use to backing up vm0.
We can check this is completed in our Services vault > Backup items
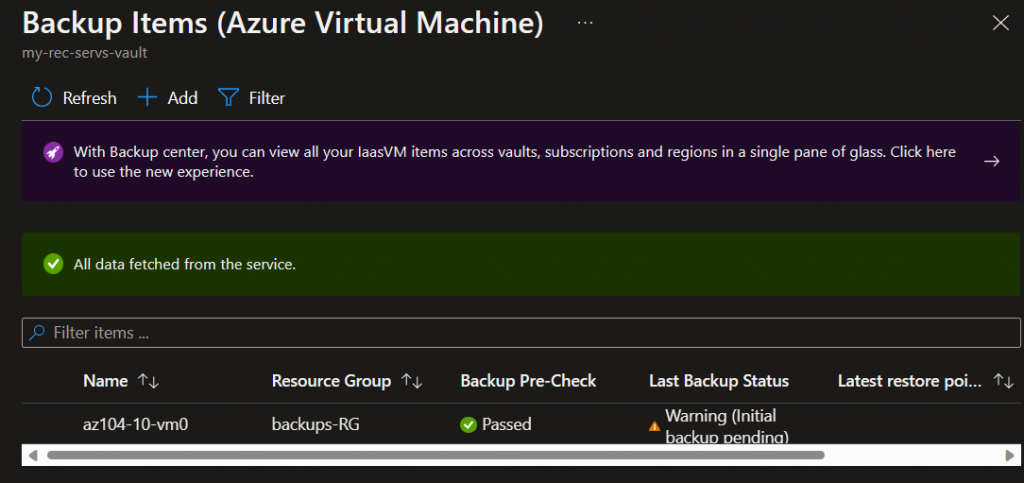
Let’s click on it and do our backup.
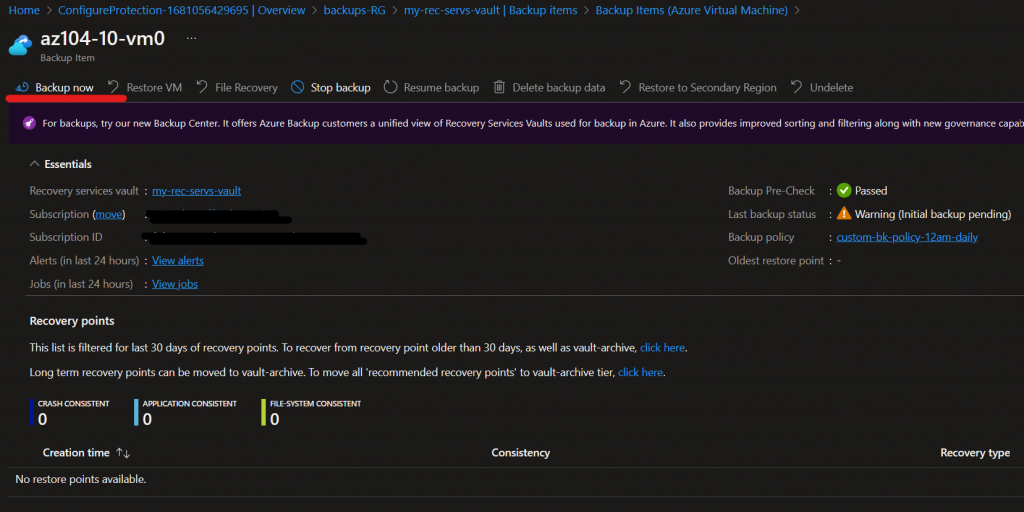
And we have completed task 3! On to the next one.
- Task 4: Implement file and folder backup.
- Connect through remote desktop to a virtual machine and access the Azure portal.
- Configure the Recovery Services vault to back up on-premises files and folders.
- Install the download agent for Windows Server or Windows Client.
- Register the agent with the Recovery Services vault.
- Create a backup schedule and back up local files.
- Confirm the backed-up files are in the Recovery Services vault.
Let’s RDP to VM01 and access the portal from it. We will configure this VM as it was an on-prem VM with files and folder. Going to the Backup tab.
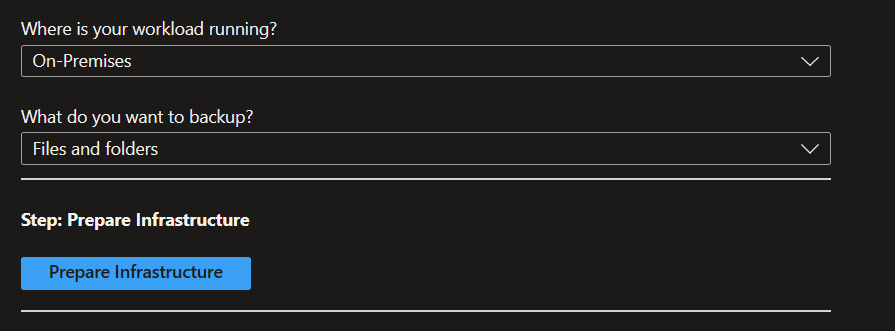
We will have to complete a few steps for this:
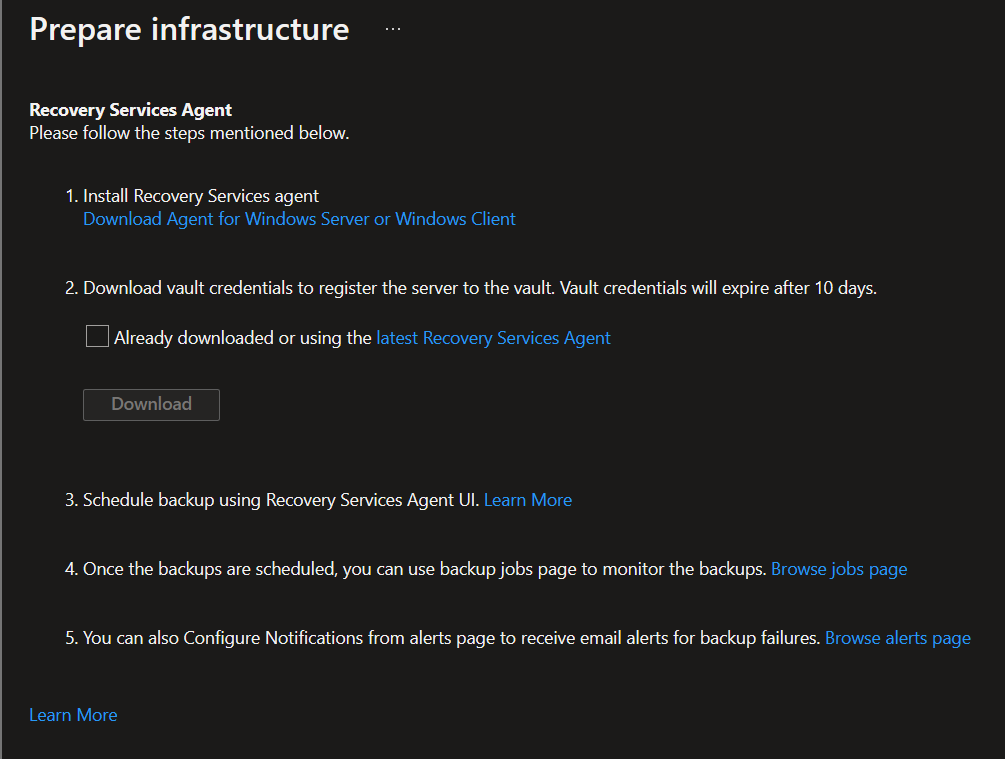
Downloading and installing Recovery Services agent. Using the default settings.
Downloading the service vault credentials. This is a file, we will register the VM and set a password.
Then, we will create/schedule a backup job in our “on-prem” VM:
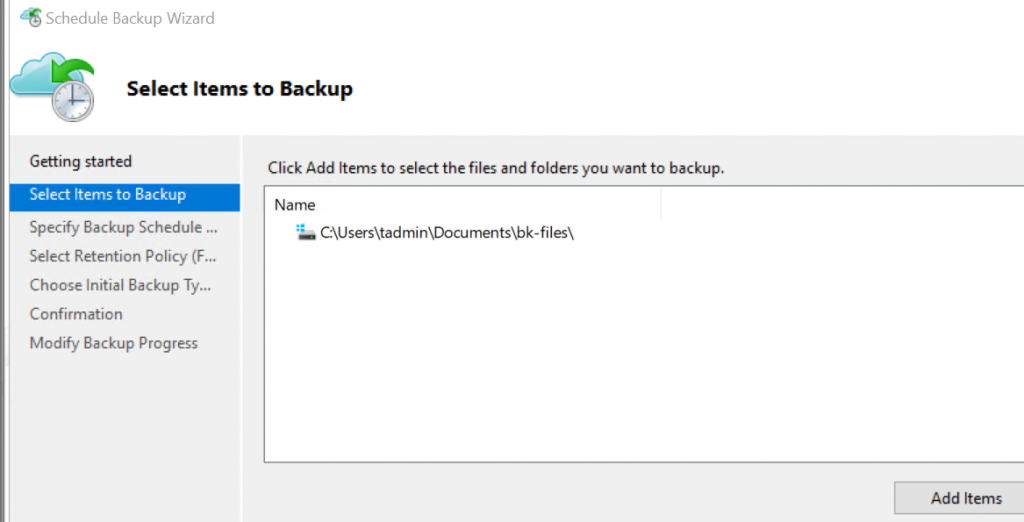
We can be very granular and setup which folders/disks/files to backup and exclude, at what times of the day (up to 3), and how do we want to transfer the files:

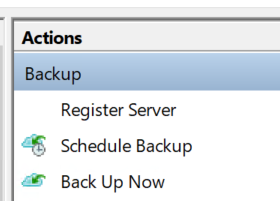
Then, let’s do our backup by clicking in backup now.
We can see the backup job completed in our services vault > Backup items > Azure backup agent. Task 4 done!
- Task 5: Perform file recovery by using the Microsoft Azure Recovery Services (MARS) agent.
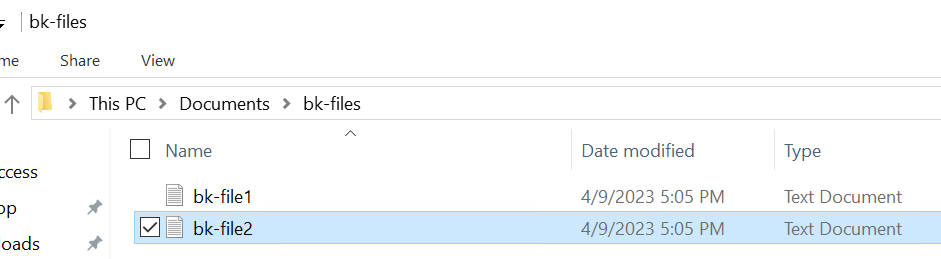
- Remove files backed up in the previous task.
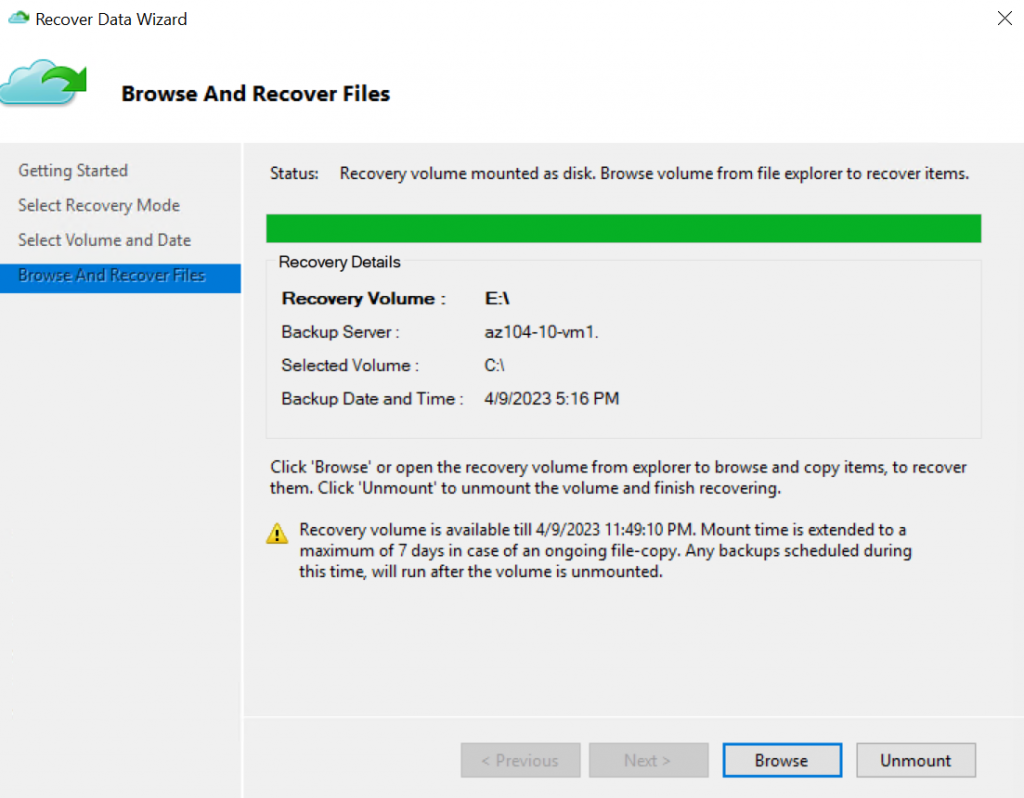
- Use the Recover Data Wizard to retrieve the deleted files.
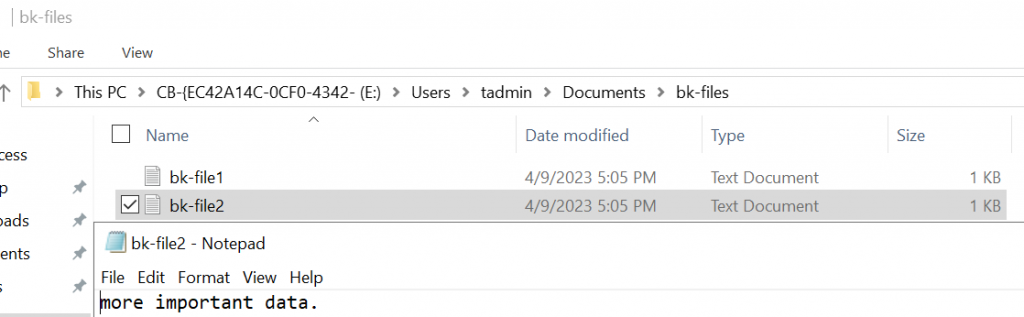
Alright, let’s delete one of the files we backed up:
Done, now we will recover it from our previous backup job made by the recovery agent. Let’s use the Recover Data action in the previous menu and follow the wizard.
Sweet! Let’s move on.
- Task 6: Perform file recovery by using Azure Virtual Machines snapshots (optional).
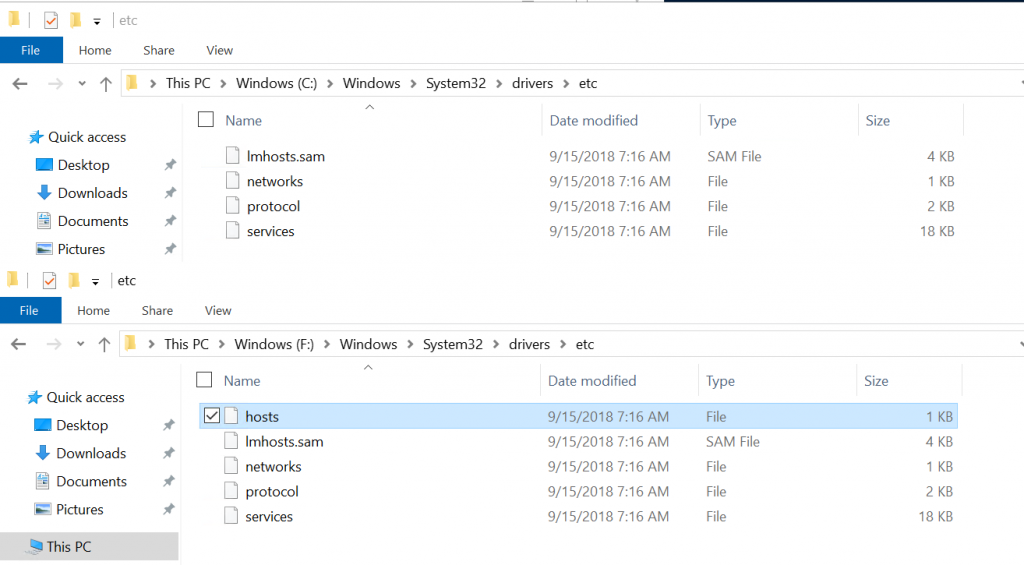
For this task, we will delete and recover a file from our vm0. I will delete the hosts file of the VM. In this location: C:\Windows\System32\drivers\etc.
To recover it, let’s head back to the portal > Recovery service vault > Backup items > VMs > Details > File recovery.
Select a restore point.
This will generate a script and a password that we will need to run in our VM to restore our files.
Once the script is completed, all the backup files will be mounted in our VM for recovery.
We can proceed to copy the hosts file back to our VM’s disk.
Let’s unmount these recovery disks from the portal.

And completed! On for our last task!
- Task 7: Review the Azure Recovery Services soft delete functionality (optional).
For this last task, we will go to Backup items > AZ Backup Agent > Details > Computer Name > Delete

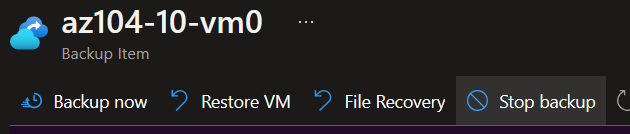
This operation will fail. Let’s head back to backup items > Azure VMs > Stop backup
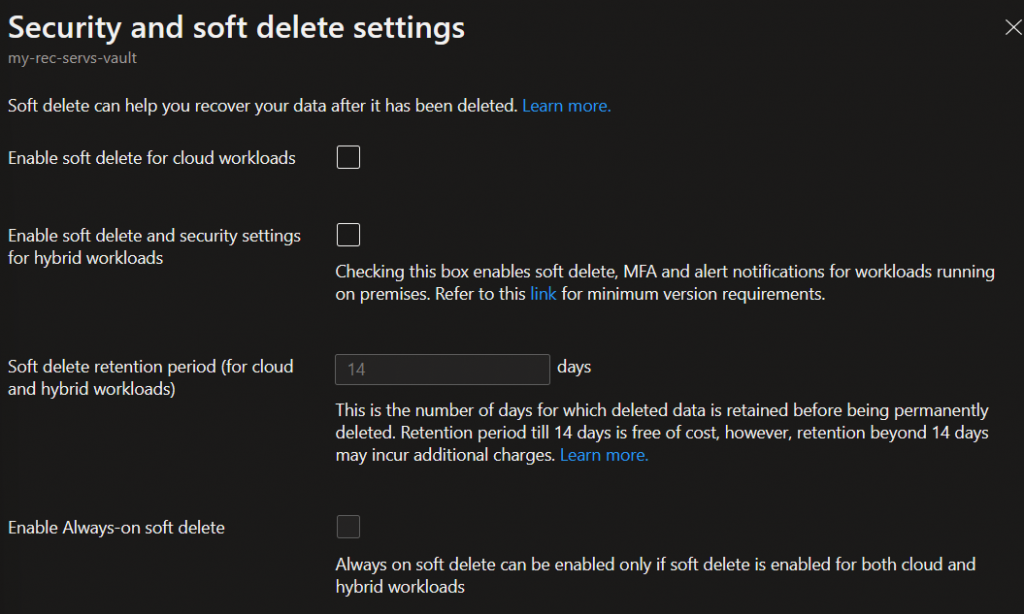
Disable the properties > Security settings
Going back to the VM Backup, this time let’s select undelete.
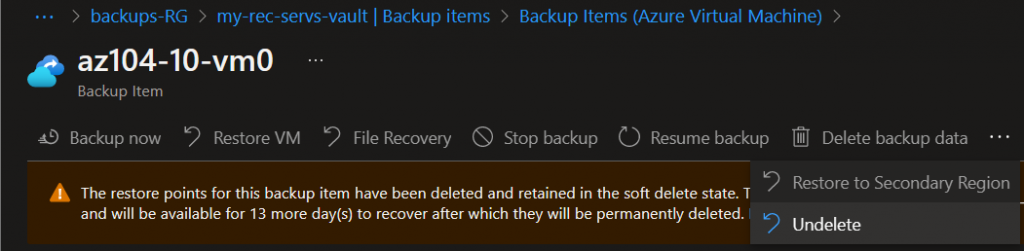
Then:

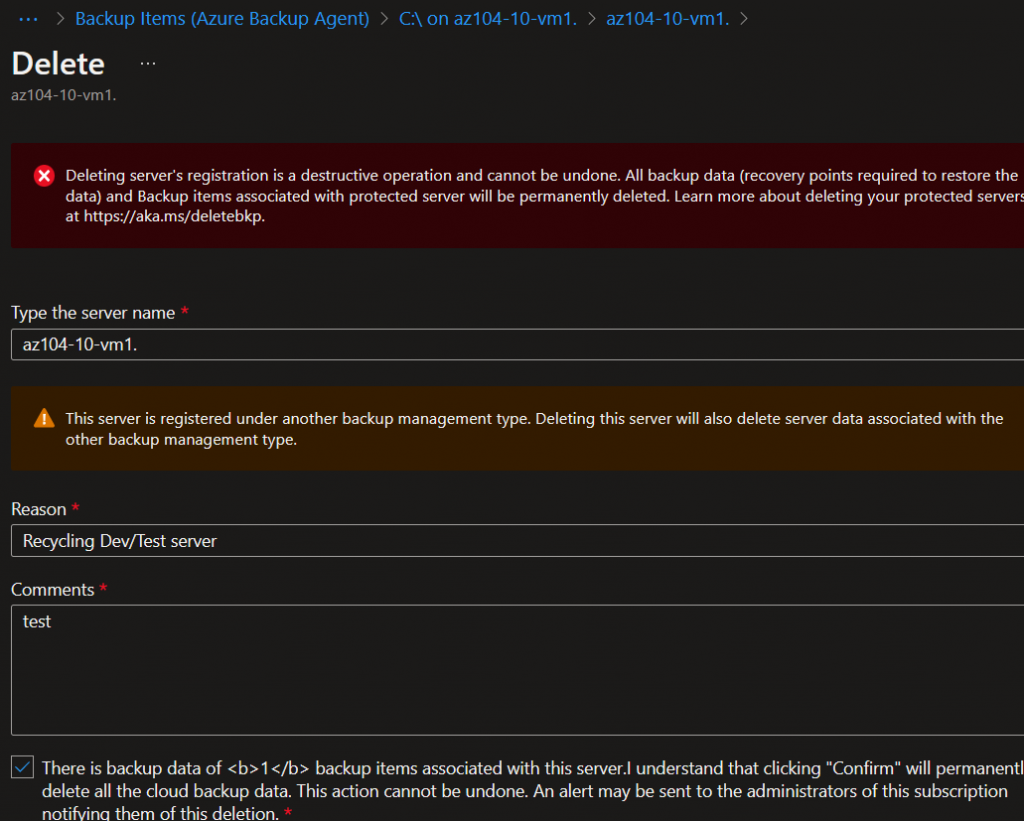
Check backup items > Azure VM Backups > details >computer name > Delete > Confirm delete:
And that’s it! Lab completed, that was interesting to review and understand how to perform Azure backups with the Azure Service Vault product. Thanks for reading and take care! 🙂